Wednesday, November 28, 2012

COVERGIRL Blastflipstick BzzCampaign-Pictures


Pretty box that my BzzKit came in. I have been waiting all morning for the mailman to come.
www.bzzagent.com
I am a Bzzagent and I received this product for free to test and reveiw.


Contains:
1. Official BzzGuide
2. 3 Covergirl blastflipsticks
 

The Beautiful Sofia Vergara
Covergirl Spokes Woman
 

Shimmery Shades
 

Creamy Bold Colors
 

Bold Color-Bright Pink
Shimmery  Gold Shade


STUNNER: Bright pink and gold shades
Gold Shimmery Shade

Deep Brown Bold Color


MINX: Deep brown and gold shades


Burgundy Bold Color
Pearl Pink Shimmery Shade


VIXEN-Burgundy and Pearl Pink Shade

 
Whats the Bzz: Dual Blended Lipstick that is blendable and endless kissable shades. One end is a creamy bold color and the other end is a shimmery shade. Apply the shimmery end all over your lips or in the center.
 
Just the Facts: Very blendable. I applied the shimmery shade over my lips quite a few times to get the color that I wanted. It did not clump or fill thick. You can create on "ombre" look on you lips. Very trendy!  Created by expert make-up artist and COVERGIRL Global Creative Design Director Pat McGrath. COVERGIRL blastflipsticks come in 13 colorful shades. You can find them at grocery stores,drug stores and major retailers for about $8.49. Do you want to see all the shades they come in? Visit www.covergirl.com or facebook.com/covergirl to check the 13 shades out.
 
The Inside Scoop: Glide on the creamy end of the stick and layer and blend the shimmery end until you have your perfect one of a kind color.


Posted by Picasa

More Christmas DIY

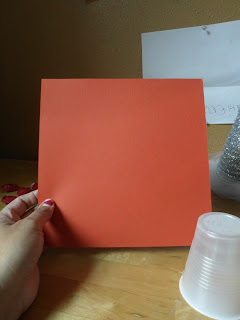
Instead of buying a foam cone from the craft store you can make your own. Just grab a paper or plastic cup to use as the base and card stock paper. I saw this on a Pinterest link:
http://spunkyjunky.blogspot.com/2010/11/tutorial-tuesday-tissue-paper-christmas.html


I did not take a picture of this but before I wrapped my tree with the silver tinsel, I wrapped it around with aluminum foil. I used a hot glue gun to glue the tinsel.


I used 2 mini tinsels and each cost $1.00. I still have plenty left over tinsel for another project. I already had a roll of tulle in my craft box. Total cost for this project: $2.00
 
I wanted to make another tree using red glitter. This time I used a smaller cup and red card stock


This tree actually came out a little bit better. Fill in any gaps with scraps of remaining card stock


Don't worry about the seams because they will be hidden


Modpodge, glitter, shoebox lid, spoon and foam brush is all you need.


This is my second layer of glitter I am adding.
Again I forgot to take picture of the first steps:/
I applied modpodge all over the tree with the foam brush. I spooned glitter all over the tree. I let it set for about 3 minutes. I applied more modpodge over the glitter but this time a little bit more thicker ( as you can see in the picture). Lastly, I added more glitter. Set aside to dry. Don't forget to pour the remaining glitter back into the bottle.Very little glitter is actually used for this project. I don't even think I used 1/4 of the bottle. I should have checked my craft bag before I left to the store. I had a jar of red,green and silver glitter in there.
Total cost of this project: $1.47 for the glitter


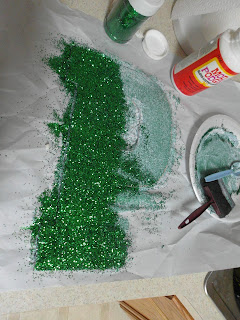
Hobby Lobby had a sale on their unfinished wooded letters so I bought the letter "P" and green glitter.


I made quite a mess with the red tree and decided to try glittering it another way. Note to self: Don't Modpodge on top of paper, project will stick to it.


I applied a thin coat of Modpodge all over the letter. I poured modpodge on a plate and mixed the glitter into it. It looked really thick and clumpy. I did not think it was going to work. I grabbed my foam brush and started painting it on and it applied very nicely.


I really wanted to make sure that the green was going to show so poured more glitter on top of it.
Total cost:$3.00 for letter and glitter


These are my DIY's  for right now. If I do more I will post them.
 
All I need to do is add a few more things and it will look complete.

If you look hard enough you probably have everything you need for these crafts in your home. Thanks for stopping by♥


Sunday, November 25, 2012

Christmas-Tin Cans Upcycle DIY

So when it comes to Christmas decorations for the house I am the worst. I went to Michaels Saturday night and saw this lady with her buggy full of holiday picks and stems and just humming along to the Muzak Christmas music. She grabbed different bundles of picks and made cute arrangements in her hand. Gosh I wish I was able to have an eye for stuff like that. I lingered around the aisle  where the humming lady was to get a few ideas from her. So her is my quick and easy holiday decor. I used items that I already had in my home. Feel free to use what you have. Let me know if you do something like this. I would love to see your projects.


Clean out empty tin can with soap and water and let air dry completely


remove label


If you know how to crochet make a long chain to fit around the can. I used a thicker yarn for the red can. If you don't know how to crochet you can buy this thicker yarn by Loops and Thread  and wrap it around the can 2X. With the white can above, I used a thinner yarn and it took me forever!


I hot glued the beginning of the chain into the can and started wrapping the entire can all the way to the top


I used 5 picks for each can


This is the can wrapped in yarn


Poke holes into the bottom of the can


Use a hammer and nail to do this


Lastly arrange picks to your liking and you are done


I tied a bow around each can


I think this would look nice on top of the mantel or even on a small table with garland around it. This can also be decorated for any holiday,so start saving your tin cans. I know I am:)