Saturday, March 26, 2011

BzzAgent-Loreal Paris The One Sweep Eyeshadow and Double Extend Eye Illuminator Review

Loreal Paris-One Sweep Eyeshadow Playful for Brown Eyes

Instrucion on back

Loreal Paris Double Extend Eye Illuminator in Black Quartz for Brown Eyes

Step 1


Step 2


Right Eye


Left Eye


  I am affiliated with BzzAgent. These products were given to me to review and express my own personal opinions through word of mouth. The One Sweep Eyeshadow by Loreal Paris retails for $9.95. The color I received was Playful for brown eyes. The mascara I received was the Double Extend Eye Illuminator in Black Quartz. It retails for $10.95.  I'm sure many of you have seen advertisements in magazines or television for these products.
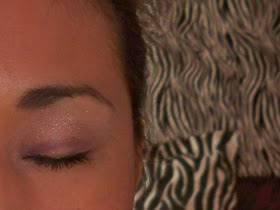
  I am going to start with the eyeshadow first. At first glance the product seems awesome. Who wouldn't like to save an extra 5 minutes putting on eyeshadow or making sure that you blended all your colors evenly to not look like a clown. The eyeshadow came nicely packaged. It has a mirror inside the 3 shade palette and a sponge applicator that looks like it would cover your eyelid with product. The pictured instructions are adhered to the back. It show you how to apply to the right eye and left eye. The colors for the brown eyes are a purple tone, grey tone and pinkish tone. They are all shimmery.  The application was very easy but I wish the colors where more pigmented. I even had primer on my lids. The eyeshadow did not cover my whole lid. It only did half at the most.  It did not reach my brow bone at all. It did not apply evenly like the pictures in the magazines show. Even after a few coats, the color still wasn't dark enough for me. For almost $10.00, I don't think I would buy this product. I would rather spend the extra 5 minutes blending my eyeshadow with my everyday eyeshadow brushes.
 Now for the mascara.To begin with, my eyelashes are super short. This mascara is something that I really liked. It did lengthen my lashes. It did not make them fuller but that was not what it was being advertised for. After applying 2 coats of Step 1 my lashes looked really pretty. After Step 2, my eyes looked brighter. I did not look as sleepy/tired anymore. Step 2 has these little bronzy pearls that really make your eyes stand out. I love it. If it would make my lashes look fuller I would most definitely buy this product.
 For more information about BzzAgent go to www.BzzAgent.com. Thank you BzzAgent for allowing and giving me these products to review.


One of those weeks.....


Alex (my baby) and Momma
This week was one of those weeks where I felt totally blah. Some times its hard to see what my husband sees when he tells me I am beautiful. Some times all I see is bumpy,snaggle,rolls,pouch,flat and just gross.I couldn't stand the way my hair looked. I decided to dye it. My husband likes it when I color it red. So I chose a red color by Garnier Nutresse. After coloring it, I realized it was not the red I usually buy. Then I didn't like the length of my hair and wanted to cut it all off. This usually happens all the time. I haven't had my hair this long since way before I got married and that was almost 10 years ago. I usually chop it off to chin length.  I kind of like it long and so does Frank. While on the treadmill, I was looking through my April edition of my All You magazine. I saw a hair style that i really liked. It was a pony tail with volume on top and no bangs. I always cover at least half of my forehead. I have a slight widows peak,but not too much. I actually like the way I looked with no bangs. I was definitely glad I did not cut my hair. This works well on 2nd day unwashed hair. I was reading one of Kandee Johnsons blogs on how to have beachy hair. She said to get a empty spray bottle and add water and salt. Ive been spraying my hair after i shower at night and the next day it looks really pretty. Its not as straight and it has some bounce/wave to it. I like it. Sometimes all you need is just a little tweak to get you feeling good about yourself again. I am ending this week feeling a whole lot better. I'm gonna love my imperfect nose, I'm going to love my little snaggle tooth (lost my retainer), I am going to love my pouch because that's where my baby came out of, and I'm gonna try that much harder on the treadmill to get that round booty. My baby looks like me and I think he's gorgeous!
                                                  
                                                                                  xoxo
                                                                               Christina

Monday, March 21, 2011

Reveal Spray Mop-A Clean House is a Happy House!!

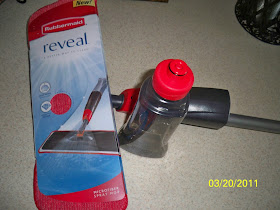
Reveal Spray Mop


Pad attaches with velcro base.
I have been wanting to try this mop out for a long time. It was on sale last week at Target for $20.00. I did'nt have time to pick it up then. This weeks sunday newspaper had a coupon for $3.00 off. After the coupon, I payed $20.00 and some change.
I can not stand for my house to be dirty or too messy. I firmly believe God blessed us with this house. And I'm going to take care of it because He gave it to us. I dont mind my sons toys in the game room or a few more toys in the living room. I can tolerate that, but having dirty floors, a yucky bathroom, or dirty sinks gross me out! Ok enough of that rant. On with this review of this Awesome Mop
The mop is a Reveal Spray Mop by RubberMaid. It comes with a refillable bottle and one microfiber cleaning pad. The base is super wide and it swivels.It allows you to get into that space between the wall and the toilet bowl and around the toilet bowl too!! All you do is fill the bottle up with water then add cleaner. It sure is going to save me money with the cleaner part because you dont need to add so much. Sometimes I get carried away and add a lot into the bucket when I am using a regular mop. After you attach the bottle, you are now ready to mop. You just squeeze the trigger and a spray of water/solution mix comes out and you mop that area. Drying time is so much faster too. It picks up dirt from the floors easliy. I love it!! No more mops for me. I think this is better that the Swifter because you dont have to spend more money buying refill pad because the microfiber cleaning pad is reusable after being washed. I had a Shark too but it broke last year. I almost like this better than the Shark too because it is cordless. Although I did like the steam from the Shark. But all in all I love my new Reveal Spray Mop. I totally recommend it!!

                                                                                    xoxox
                                                                                   Christina

Wednesday, March 16, 2011

Room Make Over part 3-Light Switch Plates


I really did not want my light switch plates to be white and I for sure did not want to spend the money to buy new ones. What I did buy though was a bottle of Mod Podge. I used a coupon for 40% off at Michael's and payed about $6.00 for it. I grabbed a sheet of white scrapbook paper that I have in my closet and searched on line for "free zebra print pattern". It took a while but I found it. If you do this search through the Bing search engine. I saved the picture that I liked, then printed it. I like using the scrapbook paper because its a little thicker than the regular printer paper. I cut the excess off the paper. I laid the switch plate over the paper and using an exacto knife I cut around where the switch is. I also made a small hole where the nails go to nail it to the wall. Next I folded the paper around the plate and proceeded to Mod Podge. I just put a small amount in the lid and used it that way. I used a regular sponge brush to apply the Mod Podge to the plate and slowly pressed down on the paper. I used a plastic card to scrape it that way no bubbles would show. After a few minutes, I applied a thin coat of Mod Podge on top to give it a shine. It dried fairly fast. After it dried completely, I hung it on the wall.
This is my first time to Mod Podge and I love it!!!!
     
                                                                                   xoxox
                                                                                   Christina

Monday, March 14, 2011

Room Make Over part 2

Plain wall
Black wall
Sponged Paraid Red
I really wanted my room to look like nothing I have ever had. Growing up my room was always a pink color. I hated it!! Once I got my own room, my dad painted it purple, which is my favorite color ever. It's crazy how I came back to pink. This pink is in between a red and pink. It's very pretty. Frank painted the back wall black. When he finished that I started sponging the pink color over it. Frank painted the rest of the walls.  We finished a little after midnight. When we woke up to look at it, it was kind of blotchy. So we headed out to Lowe's to buy one more gallon of pink. He said we probably should have put primer on the walls first. After the second coat, everything looked perfect. We then hung up the head board after the paint was completely dry.
Thanks for stopping by my page. I'll show you what else we did tomorrow!!
                                                         xoxo
                                                      Christina

Sunday, March 13, 2011

Room Make Over Part 1

My boring room
Bed Cover over ply-wood

Frank pulling and stapling

Bed cover trimmed
Zebra print material over ply-wood-Head Board Complete
We have lived in our home for about 7 years. My husband has his garage which is "his". I don't go in there unless I really have to. Nothing that belongs to me is in there. He has it set up and organized to his liking.  It's all his. My son has "his" rooms. He has his bedroom and game room. I have my room too, but unlike theirs, it was not painted......just plain and boring.
Our friend who was staying with us finally got his situation solved to I was now able to use my room again. Frank asked me if I wanted to paint my room and I said yes!! I was so excited. The bed that I have in there did not have a head board. I decided to make one, with the help of Frank of course. I bought 2 yards of zebra print material from Hobby Lobby which cost $9.00. We went to Lowe's and bought ply-wood for about $13.00.  Frank cut the wood to the size of the material minus 4 inches to allow for overlap. To give the wood a little cushion, I used an old bed cover to cover the wood. We pulled and stapled the cover over the wood and cut the excess.  We then laid the zebra print material and did the same. And there we had it, for less than $25.00, my new head board!
Frank was awesome for helping me. He is the best ever!! I love him so much!!
I will post tomorrow about the painting of my room.
                                                                                     xoxo
                                                                                    Christina

Friday, March 11, 2011

My Loves
This is a project I am starting on. I found this piece of board in my mother in laws garage while my husband and I were fixing it up last week. My father in law was a carpenter who passed away in December 2010. I saw this in the garage and I didn't want it to go to waste. I asked Frank if I could have it. He said yes so we brought it home. I want to make it to a shelve. I painted one side black with acrylic paint. Then I sponged it with this pinkish reddish color. I actually got this sample of paint for free from Lowes during a promotion. After I paint my room I will attach it to the wall and add a cute little lamp.
Cork Board-Target $2.50
Today at target I found this cork board for $2.50. The frame was already black and I just sponged it with the same paint. I then hot glued a piece if zebra print ribbon to hang it. This will also go up after I paint my room.
I can't wait to start painting. I hope to show you more pictures soon.
I haven't had the time or space to change my nails as often as have been wanting to this week. I had bought these nail polishes a couple of weeks ago and decided to try them out. The brown shade is by Sinful Colors called Nirvana. I like the way the color applies. I used three coats and if you notice on the first pictures the nice shine it has even without a top coat. I did not like this color on my skin tone to much. It made my hands look gloomy.  I grabbed my Wet n Wild Hannah Pinktana and applied 1 coat over the Nirvana. The pictures give it no justice. I thought this was an odd color combination but in the sun the polish really does look pretty.
 Thanks again for stopping by.
                                                                                  xoxo
                                                                                Christina

Tuesday, March 8, 2011

Spring Ring

I was at Hobby Lobby today and decided to buy a few things that were on sale. When ever they have the ring bases on sale, I always grab a few. The regular price is $1.47 and the sale price turns out to be about $.74. I bought two of them. I was walking down the isles and noticed this beautiful pendant. I loved the way the colors of the stones (I think they are acrylic) just blended so well. The regular price was $1.99 and it was on sale for $1.00. When I got home, I used my industrial glue to glue the base and the pendant together. I just love the result. I'm not sure if its the nail polish (OPI-Guy Meets Gal-veston ) that makes the ring look so pretty but this has to be one of my favorite rings so far. $1.74 is not to bad for a nice looking ring:)
                                                              xoxo
                                                             Christina